How to Create a Breathtaking Walk‑Through Christmas Light Display: The Definitive Commercial Guide
Introduction: Beyond Twinkling Lights—Crafting an Immersive Experience
There is a profound difference between simply seeing Christmas lights and truly experiencing them. One is a passive glance; the other is a journey into a world of wonder. Imagine visitors stepping through a glowing archway, their path illuminated by a canopy of shimmering light, the air filled with festive music as animated displays dance in perfect sync. This is the power of an immersive, walk-through light display—it transforms a public space into a destination, creates shareable moments, and builds lasting memories.
But such a spectacle doesn’t happen by accident. It is the result of a deliberate fusion of artistic vision, technical engineering, and meticulous project management. For commercial property managers, event organizers, and municipal leaders, the challenge is significant, but the rewards—from increased foot traffic and ticket revenue to invaluable social media buzz and community goodwill—are even greater.
This guide is your blueprint. We will move beyond basic decorating tips to provide a comprehensive framework for planning, designing, and executing a professional, safe, and unforgettable commercial walk-through light display.
Part 1: The Vision — Strategic Planning for a Dazzling Display
The success of a major lighting installation is determined long before the first bulb is plugged in. The initial strategic phase is the foundation upon which every other decision rests. It is about defining the “why” and “what” before you ever get to the “how.”

Laying the Groundwork: Defining Your Theme and Objectives
Every memorable display tells a story, and the theme is its narrative thread. A well-defined theme guides every decision, from color palettes and music selection to the specific types of decorative elements used. Whether it’s a classic “Winter Wonderland,” a playful “Santa’s Village,” a modern “Neon Noel,” or a custom-branded experience, the theme ensures a cohesive and professional result. It acts as a creative filter; when faced with countless options, the question “Does this support our theme?” prevents the kind of cluttered, disjointed look that can undermine a significant investment.
Equally important are your objectives. What is the primary goal of this installation?
- Increasing foot traffic for a shopping center or commercial district.
- Generating ticketed revenue for a botanical garden, zoo, or event space.
- Creating social media buzz and photo opportunities for a brand or city.
- Fostering community spirit and civic pride in a public park or town square.
Your objective directly influences the project’s scale, budget, and level of interactivity. A clear theme and set of goals are the first things a professional design partner will need to start crafting a viable proposal. For instance, an experienced firm like HOLILITE, which specializes in large-scale commercial decorations, begins its process by understanding these core strategic elements to tailor a design that delivers on specific business outcomes.
Mapping Your Canvas: Site Assessment and Layout
Once you have a vision, you must understand your canvas. A thorough site assessment is non-negotiable. Walk the entire area, identifying natural focal points like large trees, water features, plazas, and prominent architectural elements that can be highlighted. Note high-traffic pathways, but also look for potential hazards such as uneven ground, low-hanging branches, or areas that could collect water.
The next step is to translate this assessment into a detailed site map or sketch—a practice universally recommended by professional installers. This map becomes the single source of truth for the entire project. It’s not just a drawing; it is the project’s financial and logistical linchpin. A flawed map invariably leads to budget overruns, last-minute scrambles for supplies, and a poor visitor experience.
Your site map must plot:
- Visitor Pathways: Design a logical flow that guides people intuitively through the experience, preventing bottlenecks and ensuring they see all the key installations.
- Key Installations: Mark the exact locations for major focal points, such as a central mega-tree or a walk-through tunnel.
- Power Sources: Pinpoint every available electrical outlet and note its capacity. This is fundamental for the power plan.
- Distances: Measure everything twice. Accurately record the distances between elements and from elements to power sources to calculate the required lengths of light strings and extension cords.
- Safety Points: Clearly mark all emergency exits—which must remain unobstructed—fire hydrants, and potential hazards identified during your walk-through.

Budgeting for Brilliance: A Realistic Financial Plan
A professional budget accounts for far more than just the cost of the lights. Framing this budget as an investment, with costs tied directly to your objectives, is crucial for securing stakeholder buy-in. A comprehensive financial plan should include line items for:
- Commercial-Grade Lights & Decorations: The core visual assets of your display.
- Hardware & Consumables: This includes mounting clips, ground stakes, UV-resistant zip ties, bulk wire, and custom plugs.
- Structural Elements: The cost of professionally fabricated arches, tunnels, and large 3D displays.
- Power & Control Infrastructure: Controllers, timers, and potential fees for a licensed electrician to ensure safety and compliance.
- Labor: The cost for the skilled teams handling both installation and takedown.
- Permits & Insurance: Necessary administrative costs to ensure full compliance.
- Contingency Fund: A buffer of 10-15% for unexpected issues, replacement parts, or last-minute additions is a professional standard.
By connecting these costs to your goals, the conversation shifts. For example, “This $10,000 investment in a walk-through ornament is projected to become our main photo-op, generating significant social media value and attracting visitors to the plaza”.
Part 2: The Toolkit — Selecting Professional-Grade Lighting and Structures
The quality of your tools and materials will directly determine the quality, safety, and longevity of your display. For commercial applications, there is no substitute for professional-grade equipment.
The Heart of the Matter: Choosing the Right Commercial Lights
Professionals exclusively use commercial-grade LED Christmas lights, and for several critical reasons. Unlike their retail-grade counterparts which often fail after a single season, commercial products are built for durability, longevity, and safety. They feature thicker wiring, weatherproof seals, and more robust construction designed to withstand harsh winter conditions year after year.
LED technology is the undisputed industry standard. LEDs consume up to 90% less energy than traditional incandescent bulbs, drastically reducing operational costs. They also run significantly cooler, minimizing fire risk, and offer unparalleled versatility in color, brightness, and dynamic effects.
Your lighting palette will consist of several key types:
| Light Type | Primary Use Case | Key Considerations | Professional Tip |
| C7/C9 String Lights | Rooflines, outlining large structures, wrapping major tree trunks. | High visual impact from a distance. Requires specialized clips for mounting. | Use bulk SPT-2 wire for custom lengths in colder climates to avoid messy, coiled excess cord. |
| 5mm Mini Lights | Wrapping tree branches, creating dense foliage sparkle, filling in displays. | Creates a rich, layered look. Wrapping is time-intensive but effective. | Order all lights for a single project at once to ensure they come from the same diode bin for perfect color consistency. |
| Net Lights | Covering shrubs, bushes, and other uniform surfaces quickly. | The fastest way to achieve even coverage. Less customizable for irregular shapes. | Purchase extra nets to overlap edges and cover any gaps for a seamless appearance. |
| Icicle/Dripping Lights | Roof eaves, creating “falling snow” or “shooting star” effects. | Adds texture and motion. Ensure they are secured against wind. | Look for animated or “dripping” tubes for a more dynamic, modern effect. |
| Rope Lights | Outlining pathways, walkways, and architectural curves. | Provides a clean, continuous line of light. Can be rigid in cold weather. | Choose LED rope lights for better flexibility and energy efficiency. |
| RGB Pixel Strips | Animated displays, music-synchronized shows, dynamic color changes. | Ultimate creative control. Requires an advanced controller and programming knowledge. | For beginners, start with a pre-programmed controller before diving into complex DMX or xLights sequencing. |

Building the World: Structural and 3D Elements
The most immersive displays go beyond lighting existing features; they create their own environment with structural elements. This is a key differentiator between an amateur display and a professional exhibition.
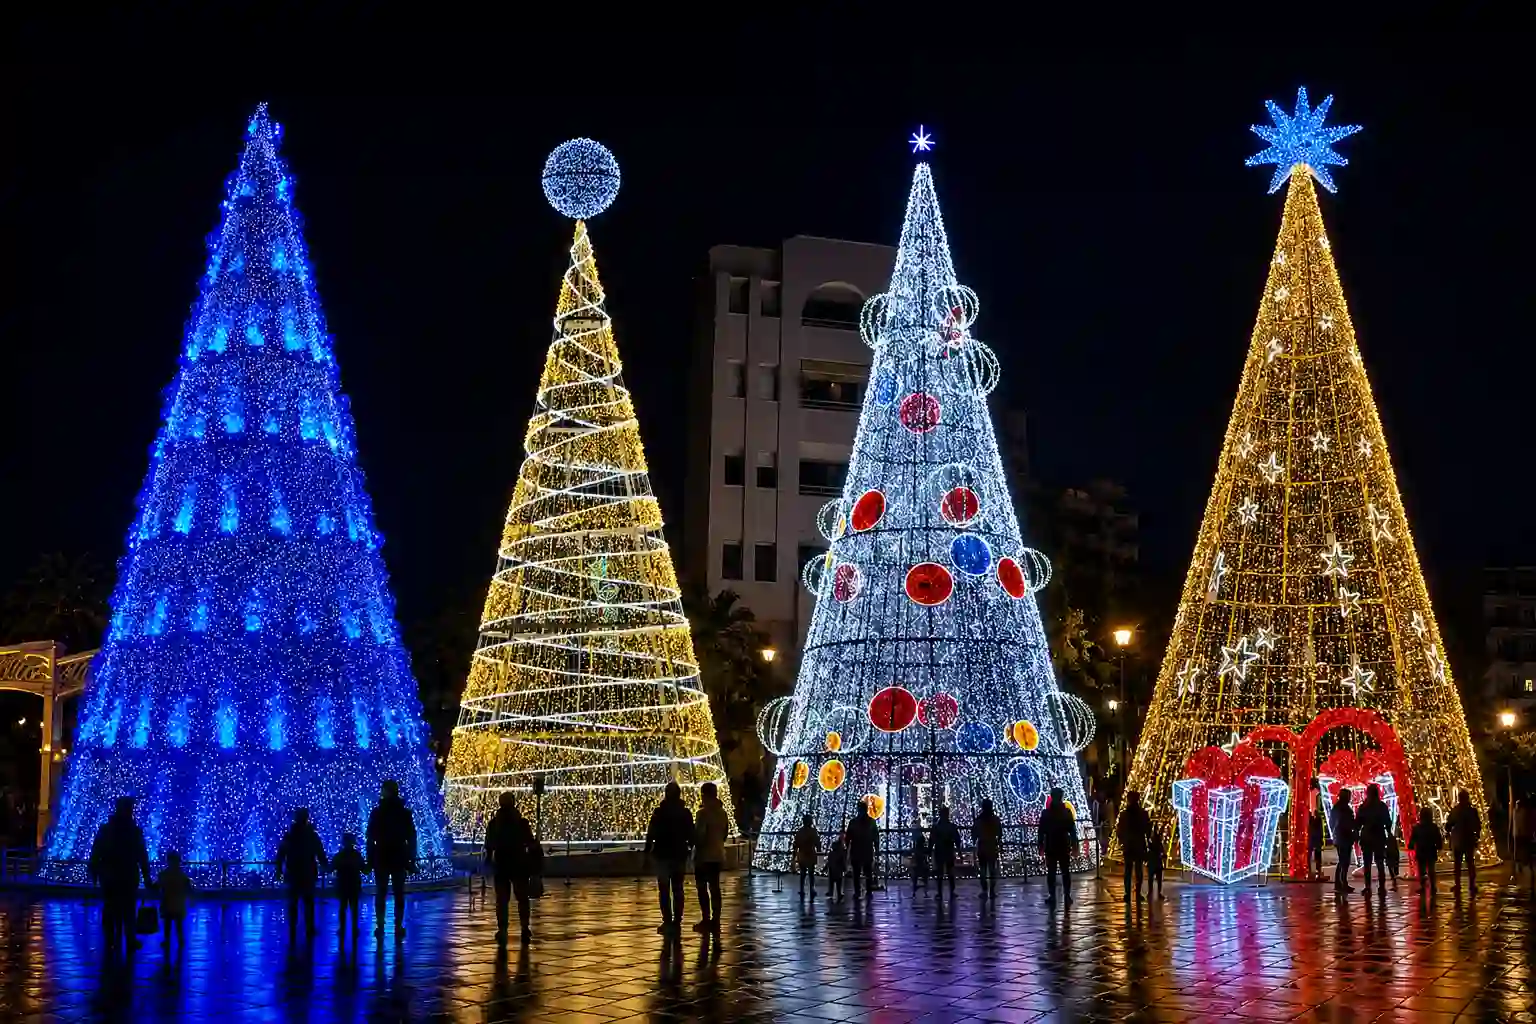
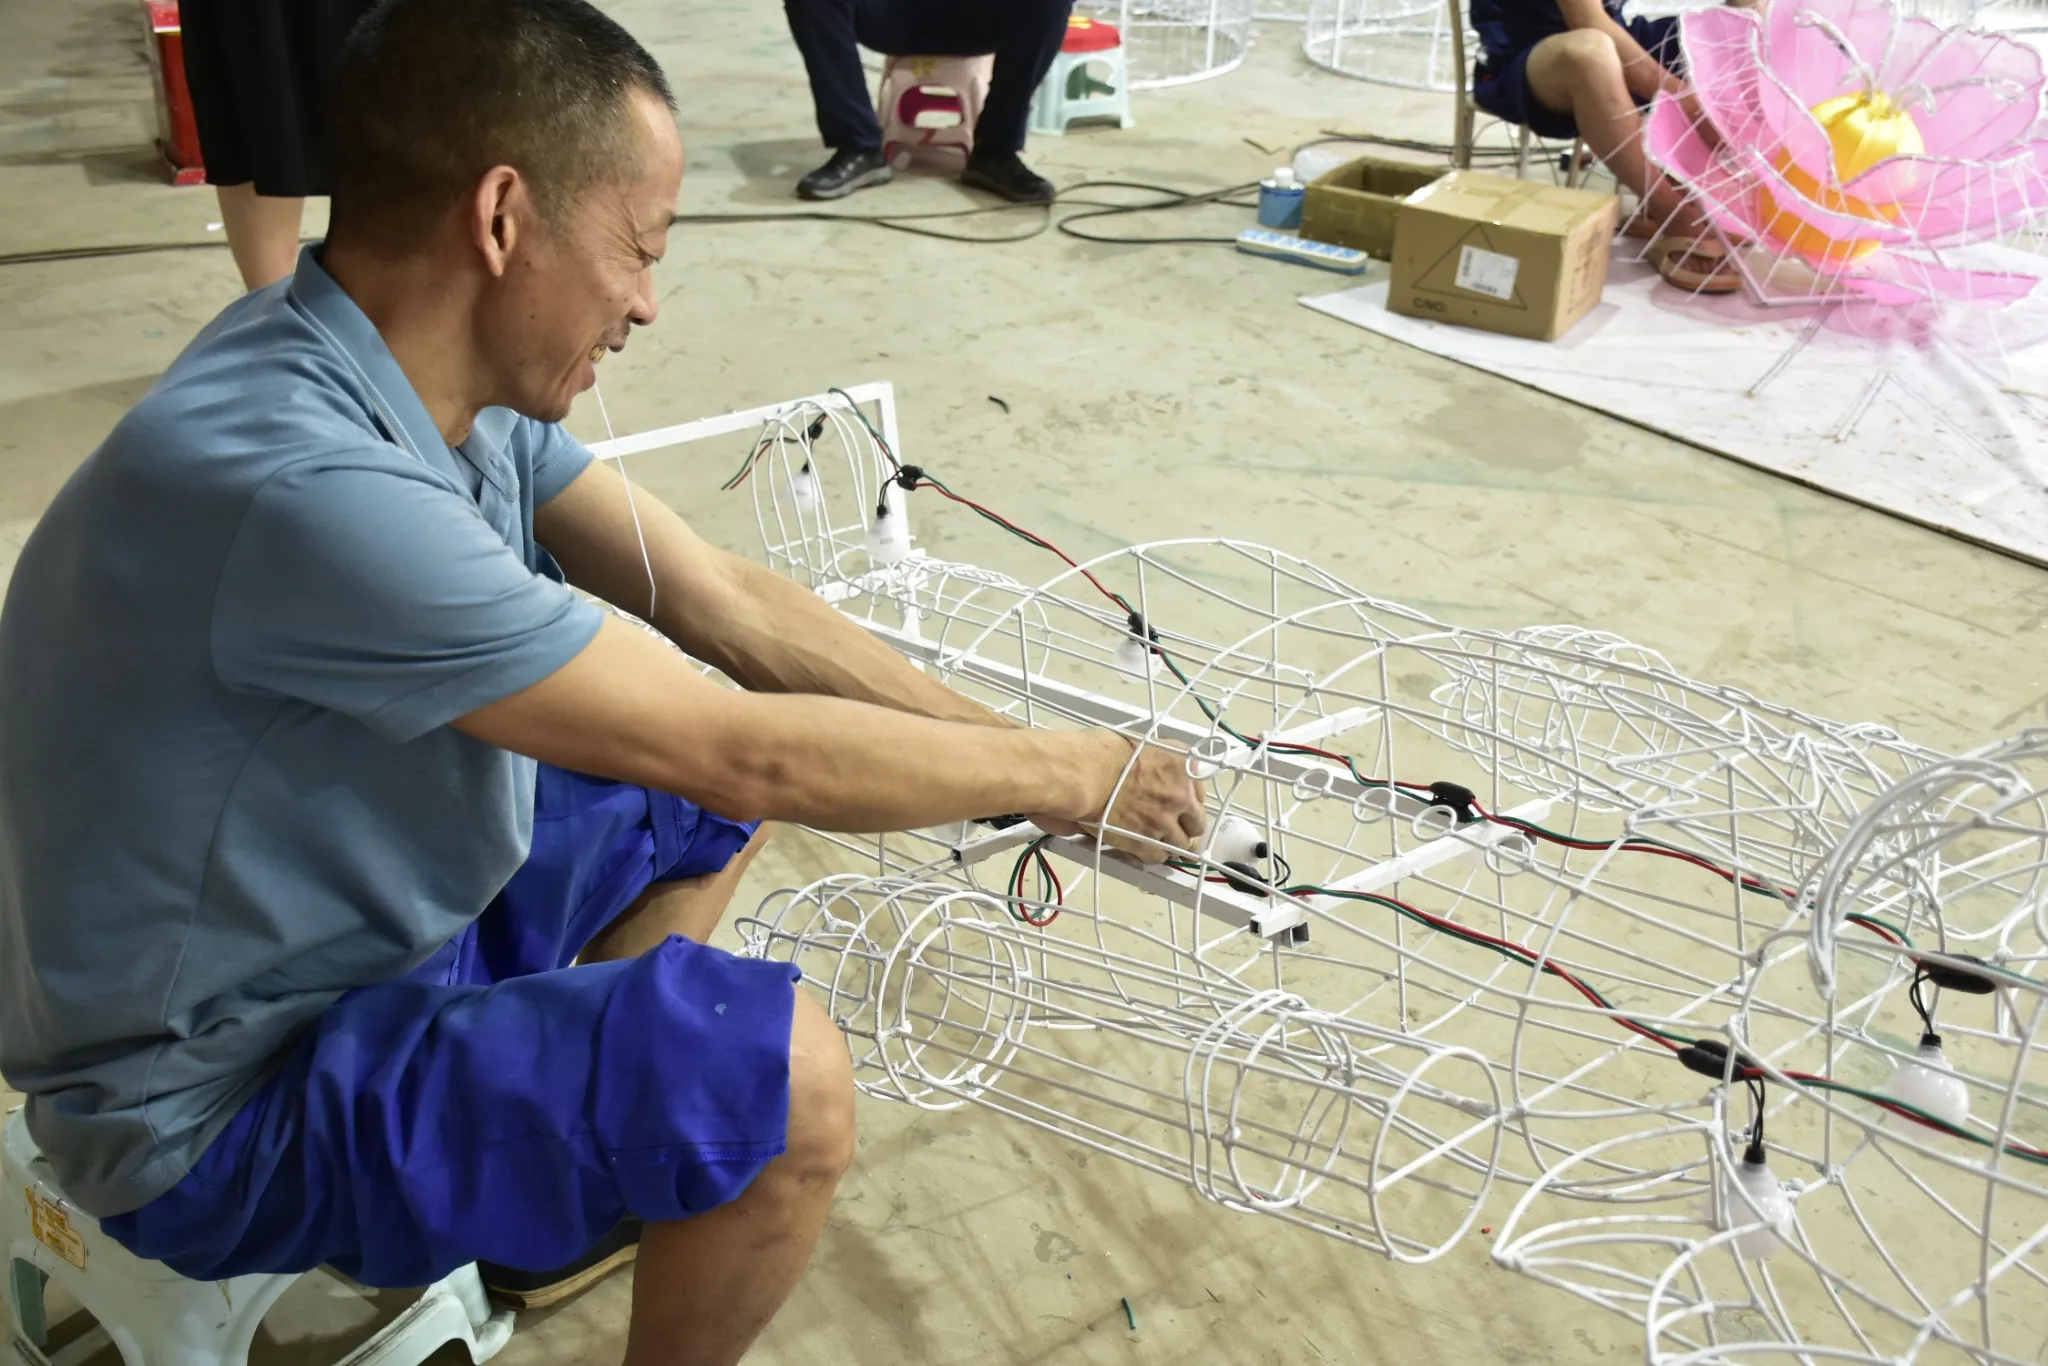
Walk-through tunnels and arches are transformative. A structure like the heart-shaped light tunnel seen here serves multiple strategic purposes. First, it creates a grand, theatrical entrance or a magical transition between different zones of your display. Second, it actively directs visitor flow, guiding them along your intended path. Most importantly, it becomes the primary “photo-op” moment. In the age of social media, these highly photogenic installations generate enormous amounts of user-generated content, effectively turning your visitors into brand ambassadors. While small-scale DIY arches can be built with PVC for private use, any large-scale, public-facing structure must be professionally fabricated and engineered for safety, durability, and visual polish.
!(image_1.jpg)
Beyond tunnels, large-scale 3D displays act as anchors for your design. Giant pre-lit ornaments, glowing reindeer, massive gift boxes, or custom fiberglass sculptures create memorable landmarks within the display, helping with wayfinding and providing additional photo opportunities.
The Unsung Heroes: Essential Hardware, Wiring, and Control Systems
The difference between a professional and amateur installation often lies in the details—the components that are felt but not always seen.
- Hardware: Using the correct mounting clips for each specific surface (shingles, gutters, brick, metal) is essential. These clips ensure a secure, damage-free installation that looks clean and straight. A novice might choose cheap zip ties, but a professional understands the true cost. Specialized clips dramatically speed up both installation and takedown, can be reused for many seasons, and prevent damage to expensive lights and building facades. The initial investment in proper hardware pays for itself quickly in saved labor hours and extended product lifespan.
- Wiring: Custom-fit wiring is the hallmark of a pro. Using bulk spools of wire (SPT-1 for general use, or thicker SPT-2 for harsh climates) with “vampire” or “zip” plugs allows you to create extension cords of the exact required length. This eliminates messy, hazardous coils of excess cord and results in a much cleaner, safer setup.
- Control Systems: The level of control determines the dynamism of your display.
- Simple: At a minimum, use commercial-grade outdoor timers or smart plugs to automate your on/off schedule, saving energy and eliminating daily manual labor.
- Intermediate: Multi-channel controllers can create simple chase sequences and animations, adding a layer of movement to your display.
- Advanced: For a truly breathtaking show, computerized systems are required. Software like xLights or Light-O-Rama, paired with DMX controllers, allows for every single light or pixel to be programmed, enabling complex animations and perfect synchronization with a musical soundtrack.
Part 3: The Artistry — Design Principles for an Unforgettable Experience
With the right tools in hand, the focus shifts from the technical to the creative. This is where you transform a collection of high-quality lights into a cohesive, emotionally resonant work of art.
Designing an Immersive Journey, Not Just a Display
A great walk-through display is a narrative experience with a beginning, a middle, and an end. Think about the visitor’s journey from the moment they arrive.
- The Grand Entrance: The first impression is everything. Use a major structural element—like a large archway, a light tunnel, or a massive 3D sculpture—to create a powerful sense of arrival and build anticipation. This signals to visitors that they are entering a special space.
- Flow and Pacing: Guide visitors along an intuitive path. Vary the density, color, and intensity of the lighting to create distinct “rooms” or zones within your display. A path that winds through a field of softly glowing spheres, opens into a plaza with a high-energy animated tree, and then leads into a tranquil, blue-lit forest creates a dynamic journey that prevents visual fatigue.
- Layers of Light: Create visual depth by thinking in layers. Use broad washes of color on walls or tree canopies for your ambient layer. Use string lights or rope lights to define paths and structures for your task layer. Finally, use spotlights or focused beams to highlight specific sculptures, architectural details, or specimen trees for your accent layer. This multi-layered approach makes the environment feel rich and three-dimensional.

The Psychology of Light: Mastering Color, Motion, and Mood
Light is a powerful tool for evoking emotion. Your choices in color and motion should be deliberate and aligned with your overall theme.
- Color Palettes: Color has a profound psychological impact. Warm whites, golds, and reds create a classic, cozy, and nostalgic atmosphere. Cool blues and crisp whites evoke the feeling of a serene, wintry landscape. A vibrant, multi-color palette feels energetic, celebratory, and modern. Sticking to a defined color palette for different zones helps reinforce the theme and creates a more sophisticated look.
- Motion and Animation: The human eye is naturally drawn to motion. Twinkling effects, dripping “snowfall” tubes, and programmed color fades add life and excitement to a static display. However, motion should be used strategically. Constant, chaotic movement everywhere can be overwhelming. Use it to draw attention to your main focal points or to create moments of high energy within the overall journey.
Collaborating with Experts for a Flawless Execution
Ambitious projects demand expert knowledge. For a marketing director at a shopping mall or a city event planner, the goal is a specific outcome—increased foot traffic, positive press—not to become a lighting engineer. Recognizing when to bring in professional help is a critical strategic decision.
Partnering with a specialist is the smart move for complex custom designs, large-scale structural installations, music-synchronized shows, or simply when your internal team lacks the time or expertise. This is a shift from managing a project to procuring an outcome. Instead of bearing the risks of sourcing, power calculation, safety compliance, and installation labor, you are investing in a guaranteed result.
A full-service provider like HOLILITE offers this end-to-end solution. They operate as a strategic partner, managing the entire lifecycle from initial design consultation and custom fabrication of unique pieces to professional on-site installation and ongoing maintenance. This approach de-risks the entire endeavor for the client and ensures a world-class display is delivered on time and on budget.
Part 4: The Execution — A Guide to Safe Installation and Operation
With a robust plan and the right materials, the final stage is execution. A disciplined, safety-first approach is essential to bring your vision to life without incident.
Power Management: Your First and Most Critical Safety Check
Electrical safety is the most important aspect of any lighting installation. There is no room for error.
- Calculate the Load: Before plugging anything in, you must calculate the total wattage of each lighting run to ensure you do not overload any electrical circuits. A single overloaded circuit can cause breakers to trip, or far worse, lead to melted wiring and fire. If you are unsure, consult a licensed electrician.
- Use GFCIs and Weatherproof Everything: All outdoor circuits must be protected by a Ground Fault Circuit Interrupter (GFCI), which will shut off the power if it detects a short. Every single component—from the Christmas lights themselves to the extension cords and timers—must be officially rated for outdoor use. Protect connections from moisture using specialized cord protectors or by elevating them to keep them out of snow and standing water.
The Installation Process: From Box to Brilliance
A systematic approach to installation will save time and prevent headaches.
- Test Everything First: This is the golden rule of professional installers. Test every light string, every controller, and every animated piece before you hang it. Finding a single bad bulb in a box is a minor inconvenience; finding it after it’s been intricately wrapped 40 feet up a tree is a major problem.
- Work Systematically: Follow your site map. Begin by installing the foundational elements: the main power distribution, the structural arches or frames, and the primary control systems. Then, move to the largest lighting elements, like wrapping major trees or outlining buildings. Finish with the smaller, detailed pieces.
- Secure Everything Tightly: Every light string and decorative element must be securely fastened to withstand wind, snow, and ice. Use the appropriate clips for each surface. Loose wires or decorations are not only a safety hazard but also look unprofessional and will detract from the display’s quality.
Post-Launch: Maintenance, Takedown, and Storage
The work isn’t finished once the display is lit. Ongoing diligence is required to keep it looking perfect throughout the season.
- Regular Inspections: Conduct weekly, or even daily, walk-throughs to check for burnt-out bulbs, loose connections, or any damage from weather or vandalism. Addressing minor issues promptly prevents them from becoming larger problems and maintains the integrity of the visitor experience.
- Meticulous Takedown: The removal process should be just as careful as the installation. Gently unclip or unwind lights, avoiding any tugging that could damage bulbs or wires. As you take items down, clean off any dirt or debris and perform a final inspection for damage.
- Smart Storage: Proper storage is key to protecting your investment for future years. Wind light strings onto reels or cardboard to prevent tangling. Store all components in clearly labeled, sealed plastic bins to protect them from moisture, pests, and dust. Store them in a cool, dry location during the off-season.
Creating More Than a Display—Creating Memories
A truly breathtaking walk-through Christmas light display is a complex undertaking, but it is one built on a clear set of principles. It is born from the marriage of a compelling creative vision, the use of professional-grade tools, the application of artistic design principles, and a rigorous, unwavering commitment to safety and execution.
The effort, however, is about so much more than light bulbs and wires. It is about transforming a space, fostering a sense of community, and creating a magical environment where people can gather, celebrate, and make memories that will last a lifetime. It is an investment in joy, and when done right, it is an investment that pays dividends for years to come.
Frequently Asked Questions (FAQ)
What permits are typically required for a large-scale public light display?
This varies significantly by municipality. Generally, you may need permits for temporary structures, significant electrical work, road or sidewalk closures, or any event that is expected to impact traffic or generate high noise levels. It is imperative to check with your local city or county planning and permits office well in advance of your planned installation date.
How can we ensure our commercial holiday display is energy-efficient?
The most impactful step is to exclusively use commercial-grade LED lights, which consume up to 90% less energy than their incandescent counterparts. The second step is to implement automated controls. Using smart timers or programmable controllers ensures that the display is only drawing power during peak viewing hours, eliminating wasted energy overnight.
What are the most common safety hazards to avoid?
The three most critical safety risks are electrical hazards, tripping hazards, and fire hazards. Electrical issues arise from overloading circuits or using indoor-rated equipment outdoors. Tripping hazards are caused by poorly routed extension cords or unsecured decorations. Fire hazards can occur when lights are placed too close to flammable materials like dry foliage or fabric. Meticulous planning, using the correct commercial-grade and outdoor-rated gear, and maintaining clear pathways are the keys to mitigating these risks.
How far in advance should we begin planning for a major holiday exhibition?
For any large-scale or custom display, planning should begin no later than late spring or early summer. The lead time for custom-fabricated structural elements or large 3D displays can be 12 to 14 weeks or even longer. Starting early also ensures you get better pricing and wider product availability before the autumn rush when suppliers are at their busiest.